Techniques

Style tells you what you're building. This is how.

Four things determine whether a layout works: what goes in first, how it's planted, how it's maintained, and whether the plants can actually grow under your light and CO2. In that order.

1. Hardscape placement

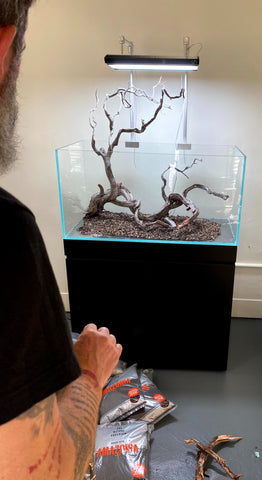
Hardscape goes in dry, before substrate is finalized and long before any water. Lay every stone or branch out on a table first — you should be able to walk away and come back without wanting to change anything before it goes in the tank.

  1. Establish a focal point off-center. Use the rule of thirds — never dead-center, never perfectly symmetrical unless the style calls for it (Dutch has no hardscape at all).
  2. Work with one material's natural lines. Mixing stone types or wood species that don't share a grain, color, or erosion pattern is the single most common beginner tell.
  3. Bury a third of what you think you need. Stones and roots that look "placed" usually aren't buried enough — nature doesn't leave things sitting on top of the substrate.
  4. Slope substrate back to front. A rear-high slope (using aquasoil or a substrate support) fakes depth and gives planting room to layer.
Dry hardscape layout placed in an empty tank, Hakkai Aquascape Gallery

2. Planting order

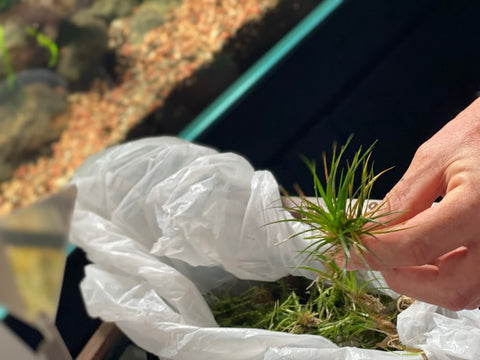
Plant back to front, tall to short, so you're never reaching over something you just placed. Rhizome plants (anubias, bucephalandra, java fern) get tied or glued to hardscape — never buried, or the rhizome rots.

  1. Background stems and tall grasses first.
  2. Midground rhizomes and ferns tied to hardscape.
  3. Foreground carpet or low-growing species last, closest to the glass.
  4. Fill water slowly over a plate or plastic bag laid on the substrate so the flow doesn't uproot fresh plantings.
Carpet plants specifically (hairgrass, Monte Carlo, glosso) do better planted in small clumps with gaps than one dense mat — they fill in faster from many small starts than one struggling large one.
Aquascape build in progress with plants being placed, Hakkai Aquascape Gallery

3. Trim & maintenance schedule

A layout that peaks once and declines wasn't maintained — it was assembled. Weekly maintenance is what separates a photo-op from an aquascape that matures.

  • Weekly: water change (30–50%), glass cleaning, dose ferts per your plant load.
  • Every 1–2 weeks: trim stem plants back to just above the previous trim line — never let them reach the surface and flop.
  • As needed: thin carpet plants that are overgrowing their intended footprint; remove any melting or decaying leaves immediately, they foul water fast.
  • Monthly: check CO2 diffuser output and clean if bubble rate has dropped — a common silent cause of stalled growth.
[Photo: trimming shears mid-trim on a stem-plant background, or a before/after trim comparison]

4. CO2 & lighting basics

More light without more CO2 is the most common way to trigger algae, not better growth. The two need to scale together.

  • Low-tech (no CO2): keep light modest and short (6–7 hrs) and choose low-light plants — anubias, java fern, crypts, most mosses.
  • High-tech (pressurized CO2): turn CO2 on 1 hour before lights, off 1 hour before lights out, target a stable drop checker color rather than chasing a bubble count.
  • Photoperiod: 6–8 hours is standard for planted tanks; more light does not mean more growth if CO2 and nutrients haven't scaled with it.
If you're seeing algae, not better growth: the light is very likely ahead of your CO2/nutrient supply, not "too much light" on its own.
[Photo: drop checker close-up showing correct green color, or CO2 diffuser with visible bubble stream]

Not sure where you are in the learning curve?

The progression guide breaks the path from first tank to competition-level layouts into stages.

Go to Progression